Desktop Guide
Getting Started
Learn what ZarachClipper does, how local-first editing works, and how to confirm the desktop app is ready.
What This Feature Does
Getting Started explains the complete local-first desktop workflow before users create their first clip.
Why Users Need It
It helps new users understand the local engine, FFmpeg, FFprobe, faster-whisper, supported import types, and what must be ready before editing.
Where To Find It
Open ZarachClipper -> Dashboard, then Settings for engine status.
Before You Start
- Installed desktop app
- Local engine running
- FFmpeg, FFprobe, yt-dlp, and transcription support available where possible
Step-by-Step Guide
- Open ZarachClipper.
- Confirm the dashboard loads.
- Open Settings.
- Check local engine status and tool status.
- Choose a storage/export location you can find later.
- Import a short local video for the first test.
Screenshot Section
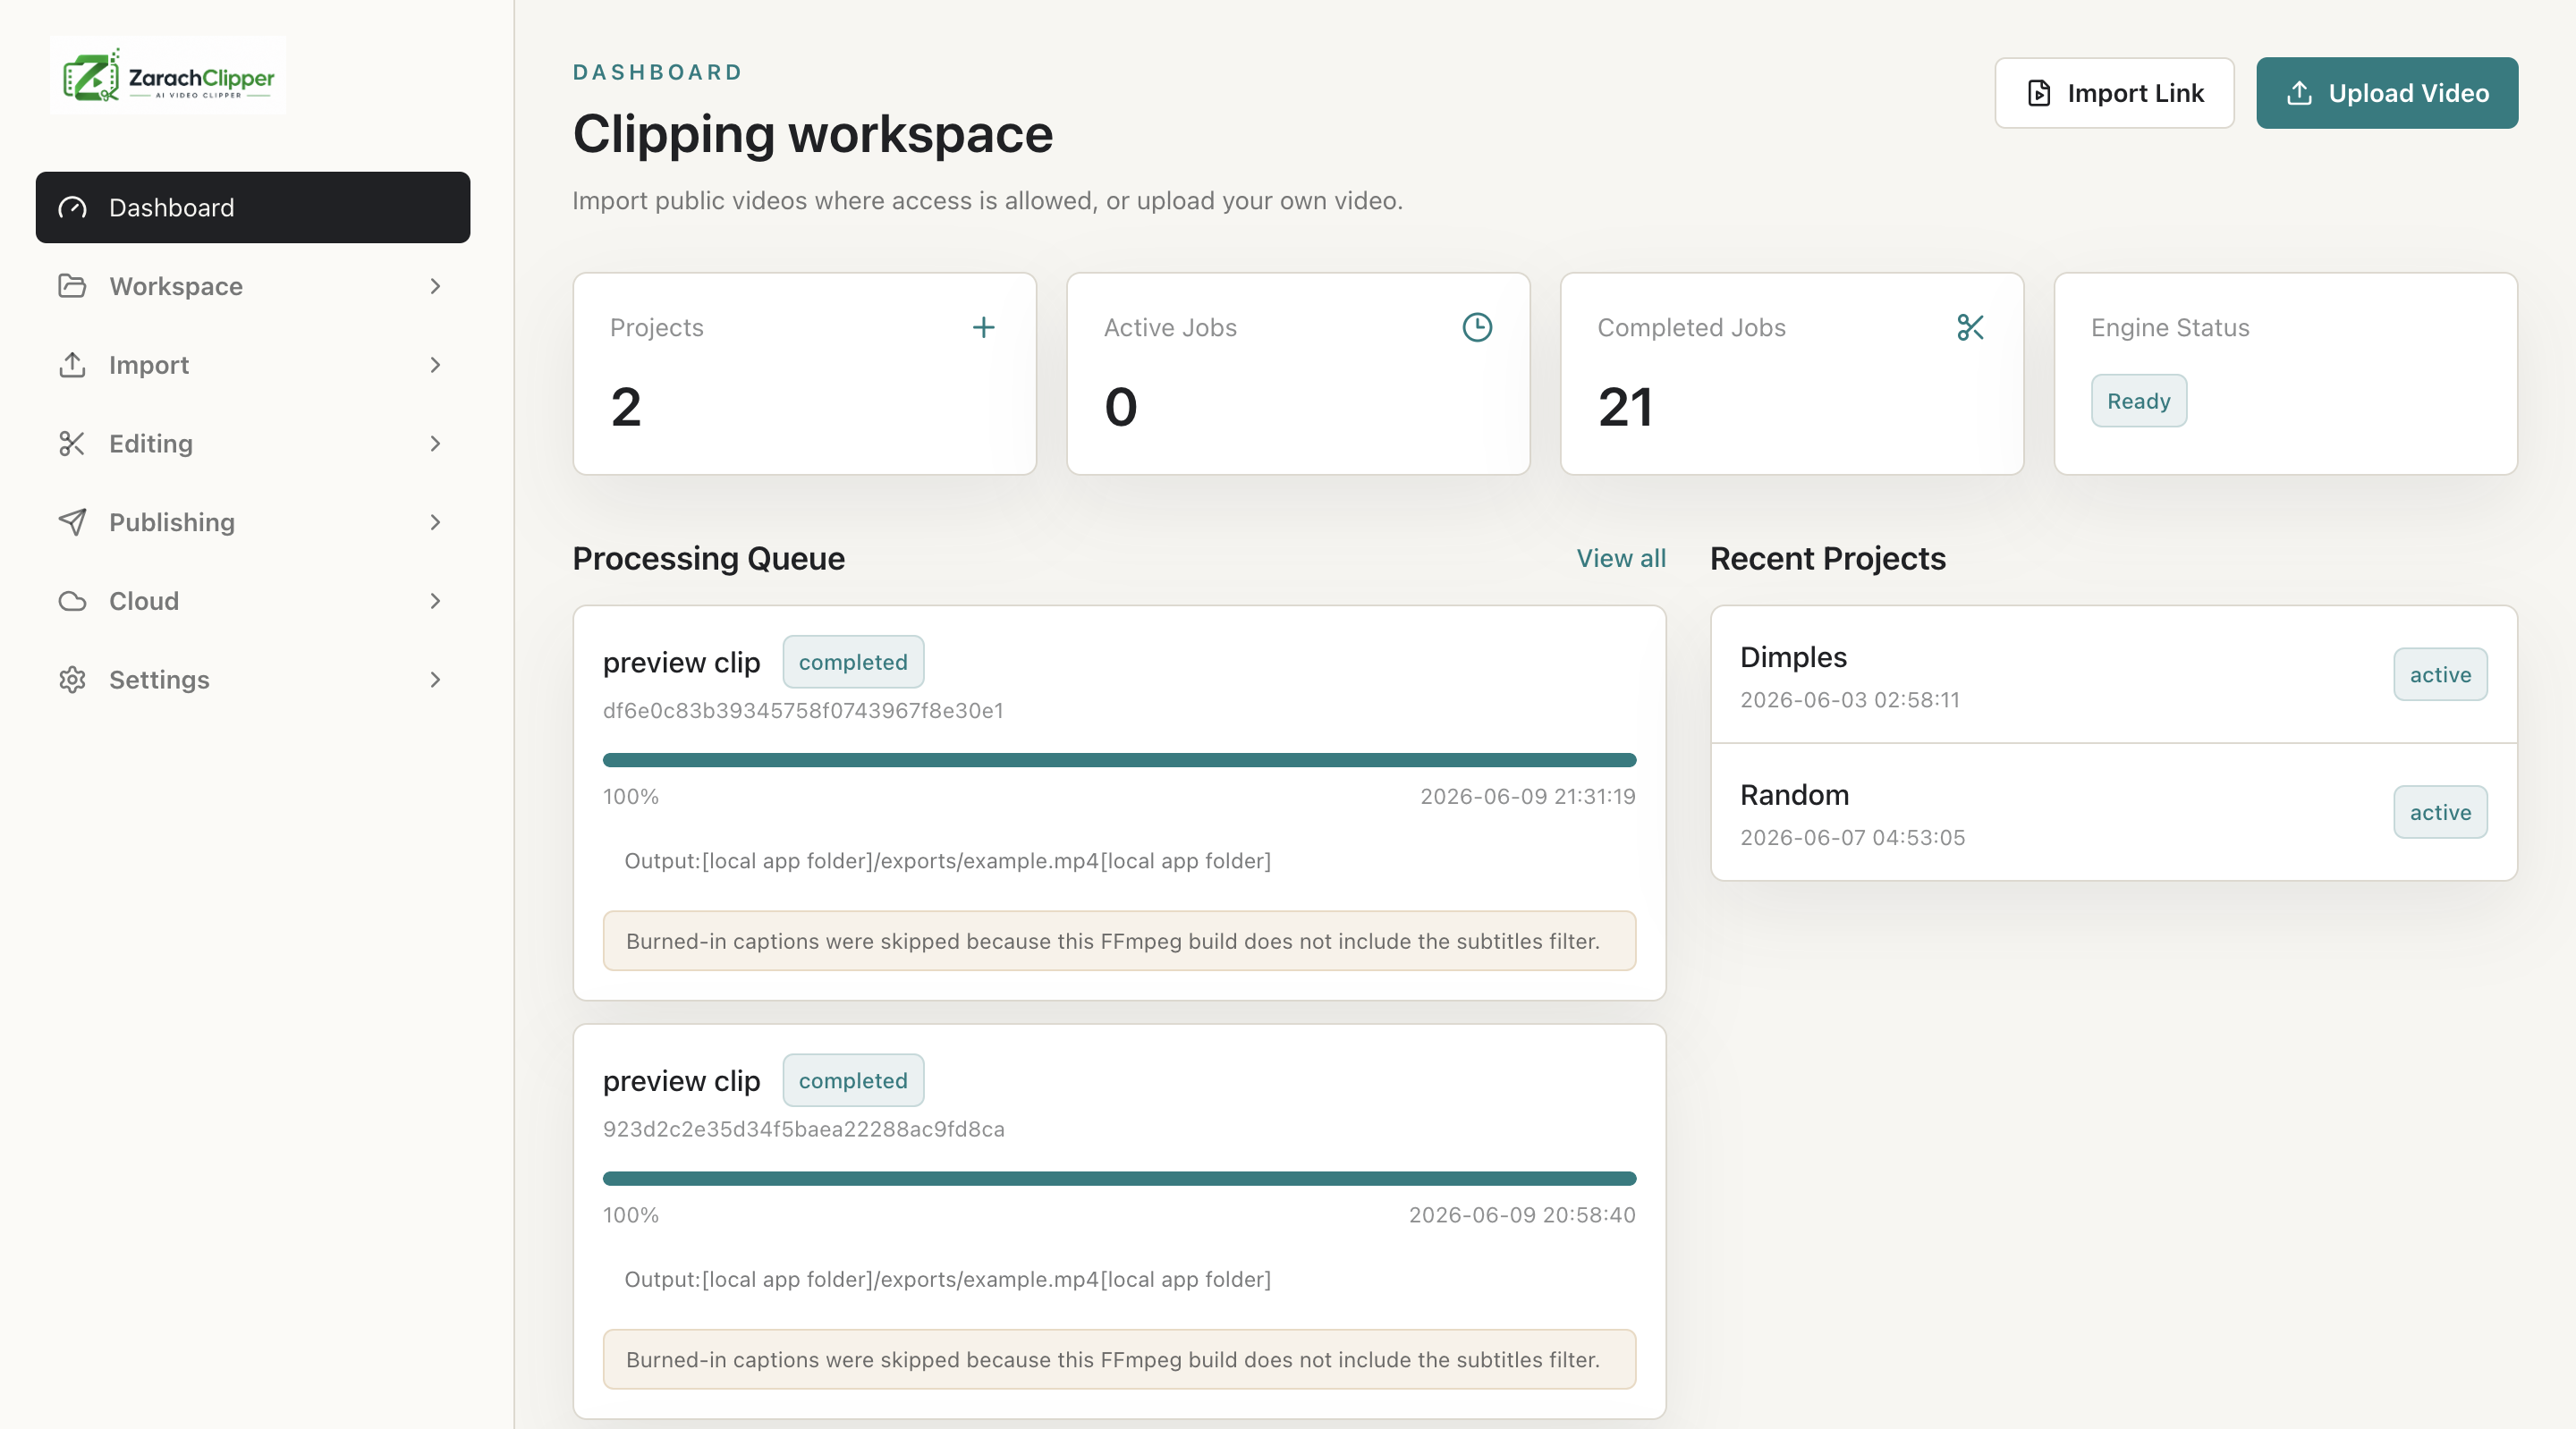
What To Check On The Screen
- Engine status shows ready
- Required tools are available or clearly marked missing
- User understands cloud login is optional for local editing
Expected Result
The user knows whether the desktop app is ready for local import, transcription, clip discovery, preview, and export.
Common Mistakes
- Trying cloud login before checking local readiness
- Running developer source commands for an installed packaged app
Troubleshooting
If the engine is offline, open Settings and restart it. If tools are missing, install or locate them from Settings.